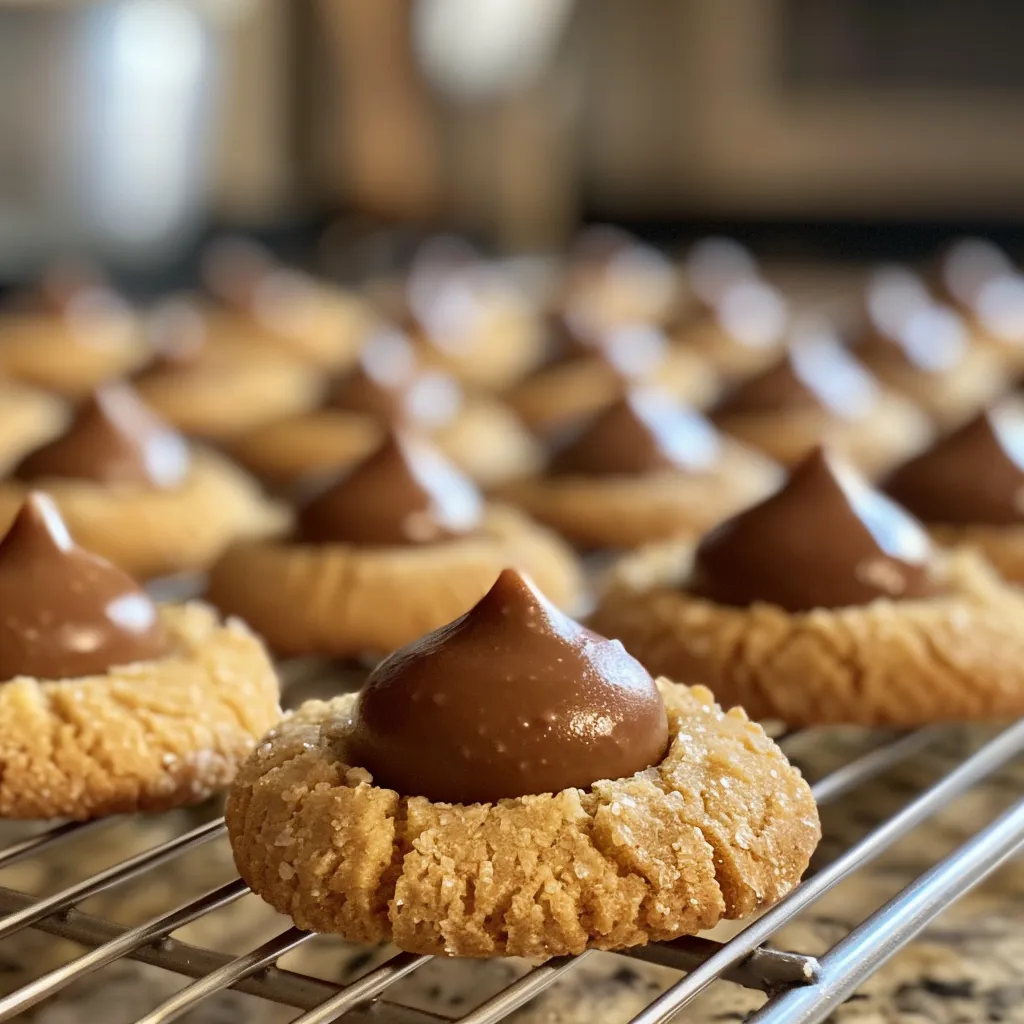
As the weather cools and the leaves begin to change, my heart swells with the anticipation of cozy evenings spent in the kitchen. There’s something magical about the sights and smells that fill the air when cookies are baking, and today, I’m excited to share a recipe that holds a special place in my heart: Thumbprint Hershey Kiss Cookies. These delightful little gems are not just cookies; they are sweet moments captured in every bite, perfect for sharing with friends and family during the festive season.
Each time I make these cookies, I’m transported back to my childhood, where my family would gather around the kitchen table, laughter echoing through the air as we rolled out dough and pressed our thumbs into the cookie balls, creating the perfect little nests for those chocolatey Hershey Kisses. It’s a simple recipe, but it brings so much joy and togetherness. So, grab your apron and let’s fill the kitchen with warmth and smiles!
Why You’ll Absolutely Love This Thumbprint Hershey Kiss Cookies
These Thumbprint Hershey Kiss Cookies are not just a treat; they’re a celebration of love, warmth, and togetherness. Here’s why you’ll absolutely adore them:
- They are incredibly easy to make, perfect for bakers of all levels!
- These cookies are a delightful blend of buttery cookie dough and rich chocolate, creating a perfect sweet balance.
- They make a wonderful addition to any holiday cookie platter, bringing smiles to all who taste them.
- Creating these cookies is a great way to make memories with loved ones, whether you’re baking solo or with family.
Ingredients You’ll Need
Let’s talk about the star players in this cookie story! The beauty of these Thumbprint Hershey Kiss Cookies lies in their simplicity. Here’s what you’ll need:
- 1 cup unsalted butter, softened: This adds that rich, buttery flavor we all crave in a cookie.
- 3/4 cup granulated sugar: For sweetness that balances perfectly with the chocolate.
- 1/4 cup brown sugar, packed: A touch of molasses flavor to deepen the sweetness.
- 1 teaspoon vanilla extract: Because every cookie deserves a hint of vanilla magic!
- 2 cups all-purpose flour: The base that holds everything together.
- 1/2 teaspoon salt: To enhance all those sweet flavors.
- 1/2 teaspoon baking powder: For a little lift in the dough.
- Hershey’s Kisses, unwrapped: The sweetest surprise in the center!
You’ll find the full ingredient list with measurements in the recipe card below!
How to Make This Thumbprint Hershey Kiss Cookies, Step-by-Step
Now, let’s dive into the fun part—making these delicious cookies! Follow along with me:
- Preheat the oven to 350°F (175°C).
- In a large bowl, cream together the softened butter, granulated sugar, and brown sugar until smooth. This step is crucial for getting that light and fluffy texture!
- Add the vanilla extract and mix until combined. The aroma will start to fill your kitchen, making it feel like home.
- In a separate bowl, whisk together the flour, salt, and baking powder. This ensures even distribution of the dry ingredients.
- Gradually add the dry ingredients to the wet ingredients, mixing until just combined. Be careful not to over-mix; we want tender cookies!
- Roll the dough into 1-inch balls and place them on a baking sheet lined with parchment paper. Give them some space; they’ll spread a bit!
- Use your thumb or the back of a spoon to make an indent in the center of each dough ball. This is where the chocolate will sit!
- Bake for 10-12 minutes or until the edges are lightly golden. The smell in your kitchen will be heavenly!
- Remove from the oven and immediately press a Hershey’s Kiss into the center of each cookie. Let the chocolate melt just a bit, creating that irresistible gooeyness.
- Allow to cool on the baking sheet for a few minutes before transferring to a wire rack to cool completely. Try not to sneak too many cookies during this time!
Pro Tips for the Best Results
Here are a couple of my tried-and-true tips to ensure your cookies turn out perfect:
- Room Temperature Ingredients: Make sure your butter is softened to room temperature for easy creaming with sugars.
- Don’t Overbake: Keep an eye on your cookies; they should be lightly golden at the edges. They’ll continue to cook a bit after you take them out of the oven!
- Use Fresh Hershey’s Kisses: For the best melting experience, ensure your Kisses are fresh and unwrapped just before baking!
Serving Suggestions
These Thumbprint Hershey Kiss Cookies are delightful on their own, but why not elevate the experience? Here are some fun serving suggestions:
- Serve with a glass of cold milk or a warm cup of hot cocoa for the perfect pairing!
- Place them on a festive platter and gift them to friends or neighbors; they make a lovely homemade present.
- For a fun twist, sprinkle some chopped nuts or festive sprinkles on top of the chocolate before it sets!
Storage and Make-Ahead Tips
If you find yourself with leftover cookies (which is rare!), here’s how to store them:
- Room Temperature: Store in an airtight container at room temperature for up to a week.
- Freezing: You can freeze the baked cookies for up to three months. Just place them in a single layer in a freezer-safe container.
- Make-Ahead: You can prepare the dough ahead of time, roll it into balls, and refrigerate for up to three days before baking.

Thumbprint Hershey Kiss Cookies
Ingredients
Method
- Preheat oven to 350°F (175°C).
- Cream butter, sugars, and vanilla until smooth.
- Mix in flour, salt, and baking powder.
- Form 1-inch balls, make an indent, and bake 10-12 minutes.
- Press Hershey's Kisses into each cookie immediately after baking.
Notes
Loved this recipe? Save it to your favorite Pinterest board so you can easily find it later! It’s the perfect way to keep all your sweet ideas in one place. ✨