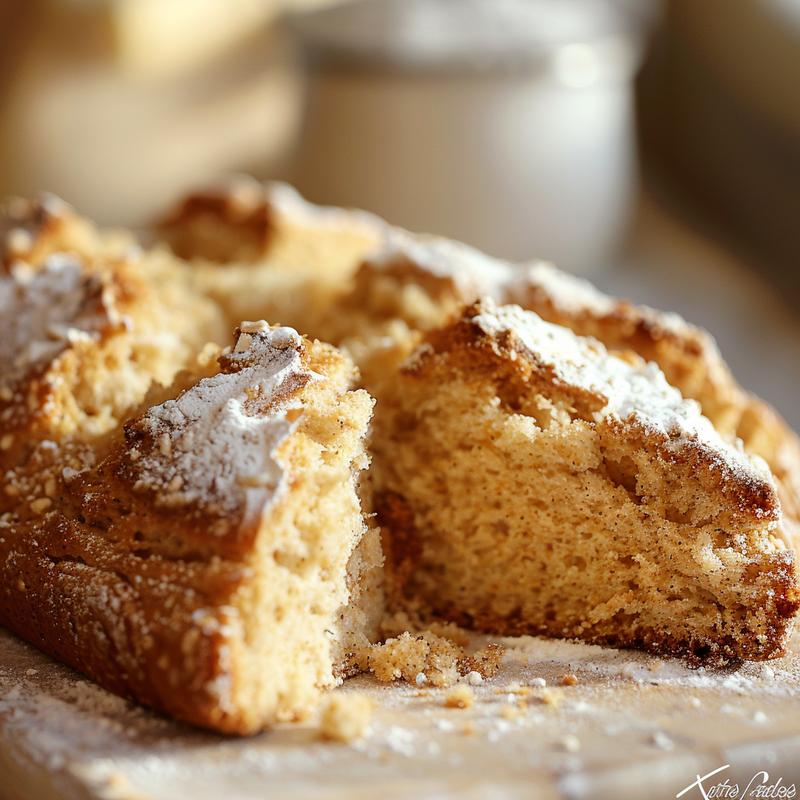
Hey y’all! Emily here, straight from Austin, and I’m beyond excited to share one of my absolute favorite recipes with you: Easy Gluten-Free Irish Soda Bread. Now, I know what you might be thinking: gluten-free and Irish soda bread? Can it be done? The answer is a resounding YES! And trust me, this recipe is so simple, so delicious, and so comforting, it’ll become a staple in your kitchen. I’ve spent countless hours perfecting this recipe, making sure it captures the rustic charm and heartwarming flavor of traditional Irish Soda Bread, but without the gluten. It’s perfect for St. Patrick’s Day, a cozy weekend brunch, or any time you’re craving a slice of homemade goodness.
I remember the first time I tried making soda bread. It was a complete disaster! The dough was too stiff, the bread was rock hard, and I almost gave up entirely. But I was determined to crack the code. After many attempts (and a few more failures), I finally landed on this recipe. It’s foolproof, even if you’re a beginner baker. So grab your apron, and let’s get baking!
Why You’ll Love This Gluten-Free Irish Soda Bread
Okay, so why should you try this recipe? Let me tell you!
- **Quick and Easy**: This bread comes together in under an hour, from start to finish. No yeast, no kneading, no fuss!
- **Gluten-Free**: Perfect for those with gluten sensitivities or celiac disease. You won’t believe it’s gluten-free – it’s that good!
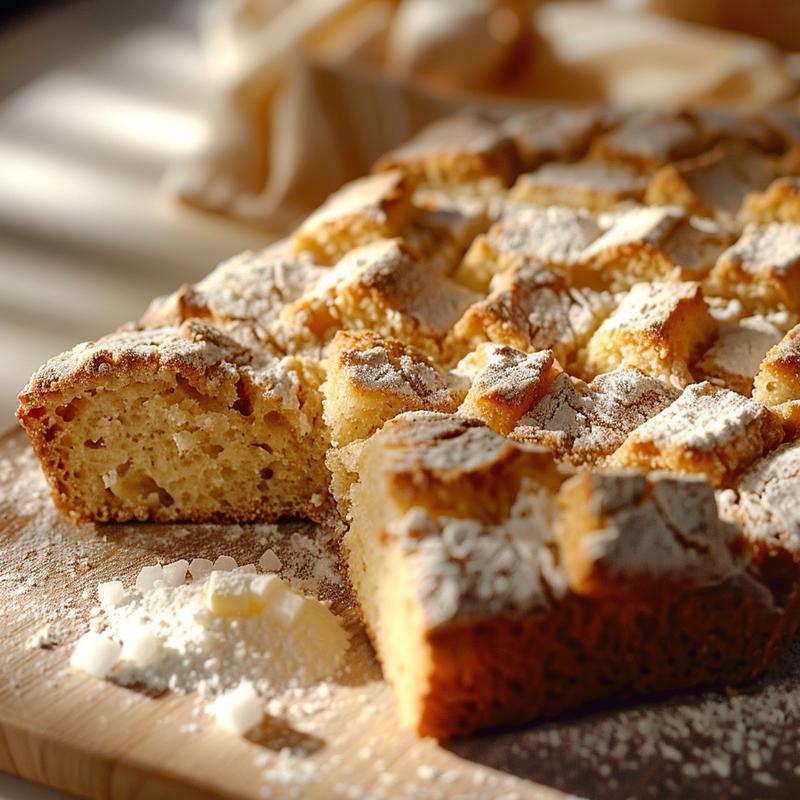
- **Rustic and Delicious**: It has that classic, slightly tangy flavor and dense, crumbly texture that makes Irish Soda Bread so irresistible.
- **Versatile**: Enjoy it plain, with butter and jam, or as a side to your favorite soup or stew. It’s even great toasted!
- **Heartwarming**: This bread just evokes feelings of warmth, comfort, and home. It’s the perfect way to celebrate St. Patrick’s Day or any cozy occasion.
Honestly, I’m obsessed with this recipe. The taste of soda bread was always something I loved, but finding a gluten-free version that actually delivered on both taste and texture felt impossible until I created this recipe. I’m so excited for you to try it!
Ingredients for the Best Gluten-Free Soda Bread
Let’s break down the ingredients. Don’t be intimidated; it’s a pretty straightforward list!
- **4 cups gluten-free all-purpose flour blend (with xanthan gum)**: This is the base of our bread. Make sure your blend contains xanthan gum, as it helps bind the ingredients together and gives the bread structure. I recommend a blend that is designed to substitute 1:1 for all-purpose flour.
- **1 teaspoon baking soda**: This is what gives the bread its rise. Baking soda reacts with the buttermilk to create carbon dioxide, which makes the bread light and airy.
- **1 teaspoon salt**: Enhances the flavor of the bread.
- **1/4 cup granulated sugar**: Adds a touch of sweetness and helps balance the tanginess of the buttermilk.
- **4 tablespoons cold unsalted butter, cut into cubes**: Adds richness and flavor. The cold butter creates pockets of steam as it bakes, resulting in a tender crumb.
- **1 3/4 cups buttermilk**: This is the key ingredient! Buttermilk adds moisture, tanginess, and helps activate the baking soda. If you don’t have buttermilk, you can make a substitute by adding 1 3/4 tablespoons of lemon juice or white vinegar to regular milk and letting it sit for 5 minutes.
- **1 large egg, lightly beaten**: Adds moisture and helps bind the ingredients together.
- **1/4 cup raisins or currants (optional)**: For a touch of sweetness and texture. I personally love the addition, but you can leave them out if you prefer.
These ingredients are so simple, but the magic they create together is incredible. The combination of buttermilk and baking soda is what makes soda bread was what it is, and these ingredients are easy to find. Remember, using quality ingredients will always yield the best results.
Step-by-Step Instructions for Baking Your Soda Bread
Alright, let’s get to the fun part – baking! Follow these simple steps, and you’ll have a delicious loaf of gluten-free Irish Soda Bread in no time.
- **Preheat oven to 400°F (200°C).** Line a baking sheet with parchment paper. This will prevent the bread from sticking.
- **In a large bowl, whisk together the gluten-free flour, baking soda, salt, and sugar.** Make sure everything is well combined.
- **Cut in the cold butter using a pastry blender or your fingers until the mixture resembles coarse crumbs.** This is an important step! The cold butter creates pockets of steam as it bakes, resulting in a tender crumb. If you don’t have a pastry blender, you can use your fingers, but work quickly to prevent the butter from melting.
- **In a separate bowl, whisk together the buttermilk and egg.** Make sure the egg is well incorporated into the buttermilk.
- **Add the wet ingredients to the dry ingredients and stir until just combined. Do not overmix.** This is crucial! Overmixing will develop the gluten in the flour (even though it’s gluten-free!), resulting in a tough bread. Stir just until the ingredients are moistened. The dough will be shaggy and a little sticky – that’s okay! It s important to not over mix the dough.
- **If using, gently fold in the raisins or currants.** Be careful not to overmix.
- **Turn the dough out onto a lightly floured surface and shape it into a round loaf about 1 1/2 inches thick.** The dough will be a little sticky, so don’t be afraid to use a little extra flour.
- **Place the loaf on the prepared baking sheet.**
- **Using a sharp knife, cut a deep cross into the top of the loaf.** This helps the bread bake evenly and also gives it that classic Irish Soda Bread look. The cross also allows heat to penetrate the loaf more effectively.
- **Bake for 35-45 minutes, or until golden brown and a toothpick inserted into the center comes out clean.** The baking time will depend on your oven, so keep an eye on it. If the top starts to brown too quickly, you can tent it with foil.
- **Let cool on a wire rack before slicing and serving.** This is important! Letting the bread cool allows it to set properly and prevents it from being gummy.
And that’s it! You’ve just baked a loaf of delicious gluten-free Irish Soda Bread. Give yourself a pat on the back!
Pro Tips for Perfect Soda Bread
Want to take your soda bread to the next level? Here are a few pro tips that I’ve learned along the way:
- **Use cold butter**: This is crucial for creating a tender crumb. Make sure your butter is straight from the fridge.
- **Don’t overmix the dough**: Overmixing will develop the gluten (even in gluten-free flour!), resulting in a tough bread. Stir just until the ingredients are moistened.
- **Use buttermilk**: Buttermilk adds moisture, tanginess, and helps activate the baking soda. If you don’t have buttermilk, you can use a substitute, but the flavor won’t be quite the same.
- **Score the top deeply**: The deep cross on top helps the bread bake evenly and prevents it from cracking.
- **Let it cool completely**: Letting the bread cool completely on a wire rack allows it to set properly and prevents it from being gummy.
These tips may seem small, but they can make a big difference in the final product. I’m telling you, these tips are the secret to success.
Common Mistakes to Avoid
We all make mistakes in the kitchen, but knowing what to look out for can help you avoid them. Here are a few common mistakes to avoid when making gluten-free Irish Soda Bread:
- **Using warm butter**: Warm butter will melt into the flour, resulting in a dense, greasy bread. Always use cold butter.
- **Overmixing the dough**: As I mentioned before, overmixing is a big no-no. Stir just until the ingredients are moistened.
- **Not using enough baking soda**: Baking soda is what gives the bread its rise, so make sure you use the correct amount.
- **Opening the oven door too often**: Opening the oven door will cause the oven temperature to fluctuate, which can affect the baking time and texture of the bread. Try not to open the door until the bread is almost done.
- **Slicing the bread while it’s still hot**: Slicing the bread while it’s still hot will cause it to crumble. Let it cool completely on a wire rack before slicing.
Learning from my own mistakes is part of what makes baking so rewarding. Don’t be afraid to experiment and find what works best for you!
Delicious Variations to Try
Want to add your own twist to this recipe? Here are a few delicious variations to try:
- **Add herbs**: Mix in a tablespoon or two of fresh herbs, such as rosemary, thyme, or chives.
- **Add cheese**: Stir in 1/2 cup of shredded cheddar cheese or Parmesan cheese.
- **Add seeds**: Sprinkle the top of the loaf with sesame seeds, poppy seeds, or sunflower seeds before baking.
- **Make it sweet**: Add 1/4 cup of dried cranberries or chopped dates.
- **Add orange zest**: Zest of one orange to the wet ingredients for a bright, citrusy flavor.
These are just a few ideas to get you started. Feel free to get creative and experiment with your own favorite flavors! The possibilities are endless.
How to Store Your Irish Soda Bread
To keep your gluten-free Irish Soda Bread fresh, store it in an airtight container at room temperature for up to 2 days. You can also freeze it for up to 2 months. To freeze, wrap the bread tightly in plastic wrap and then place it in a freezer bag.
To thaw, let the bread sit at room temperature for a few hours or overnight. You can also reheat it in the oven or toaster oven for a few minutes to freshen it up.
The loaf of bread is best enjoyed fresh, but it can be stored. This bread that has been stored, is best served toasted.
Frequently Asked Questions (FAQ)
Here are some frequently asked questions about gluten-free Irish Soda Bread:
- **Can I use regular all-purpose flour instead of gluten-free flour?** No, this recipe is specifically designed for gluten-free flour. If you use regular flour, the bread will be tough and dense.
- **Can I use milk instead of buttermilk?** While you can use a buttermilk substitute (milk with lemon juice or vinegar), the flavor and texture won’t be quite the same. Buttermilk adds a tanginess and moisture that is essential to the recipe.
- **Can I make this recipe without eggs?** Yes, you can substitute the egg with 1/4 cup of applesauce or mashed banana.
- **Why is my soda bread dry?** Overbaking or using too much flour can result in dry bread. Make sure to measure your flour accurately and don’t overbake.
- **Why is my soda bread tough?** Overmixing the dough or using too much gluten-free flour can result in tough bread. Stir just until the ingredients are moistened and measure your flour accurately.
If you have any other questions, feel free to leave a comment below! I’m always happy to help.
Serving Suggestions for Your Delicious Bread
Now that you’ve baked your gluten-free Irish Soda Bread, it’s time to enjoy it! Here are a few serving suggestions:
- **Serve it warm with butter and jam**: This is a classic way to enjoy Irish Soda Bread. The warm bread melts the butter and allows the jam to spread easily.
- **Serve it with a bowl of soup or stew**: Irish Soda Bread is the perfect accompaniment to a hearty bowl of soup or stew.
- **Toast it and top it with avocado and a fried egg**: This is a delicious and healthy breakfast or brunch option.
- **Make it into sandwiches**: Use Irish Soda Bread to make sandwiches with your favorite fillings.
- **Enjoy it plain with a cup of tea or coffee**: Sometimes, the simplest things are the best.
No matter how you choose to serve it, I hope you enjoy this gluten-free Irish Soda Bread as much as I do! It’s a recipe that’s close to my heart, and I’m so happy to share it with you. Happy baking, y’all! I’m so glad I get to share this recipe with you. It’s something I’m really passionate about. And remember, even if your first attempt isn’t perfect, don’t give up! Keep practicing, and you’ll be baking amazing gluten-free Irish Soda Bread in no time. That s what baking is all about!

Easy Gluten-Free Irish Soda Bread Recipe to Warm Your Heart
Ingredients
Method
- Preheat oven to 400°F (200°C). Line a baking sheet with parchment paper.
- In a large bowl, whisk together the gluten-free flour, baking soda, salt, and sugar.
- Cut in the cold butter until the mixture resembles coarse crumbs.
- In a separate bowl, whisk together the buttermilk and egg.
- Add the wet ingredients to the dry ingredients and stir until just combined. Do not overmix.
- If using, gently fold in the raisins or currants.
- Turn the dough out onto a lightly floured surface and shape it into a round loaf about 1 1/2 inches thick.
- Place the loaf on the prepared baking sheet.
- Using a sharp knife, cut a deep cross into the top of the loaf.
- Bake for 35-45 minutes, or until golden brown and a toothpick inserted into the center comes out clean.
- Let cool on a wire rack before slicing and serving.
Notes
Loved this recipe? Save it to your favorite Pinterest board so you can easily find it later! ✨