Discover the Ultimate Banana Chocolate Chip Bundt Cake!
Hey there, cake lovers! 🍰 If you’re on the hunt for the moistest, most flavorful dessert ever, trust me, you’ve just stumbled upon a game-changer. This Banana Chocolate Chip Bundt Cake is not only stunning to look at, but it also tastes like a slice of pure heaven! Perfect for brunch, dessert, or just because you deserve a treat, this cake is the answer to all your sweet cravings. So grab your mixing bowl and let’s dive into this delicious adventure!
Why You’ll Love This Recipe
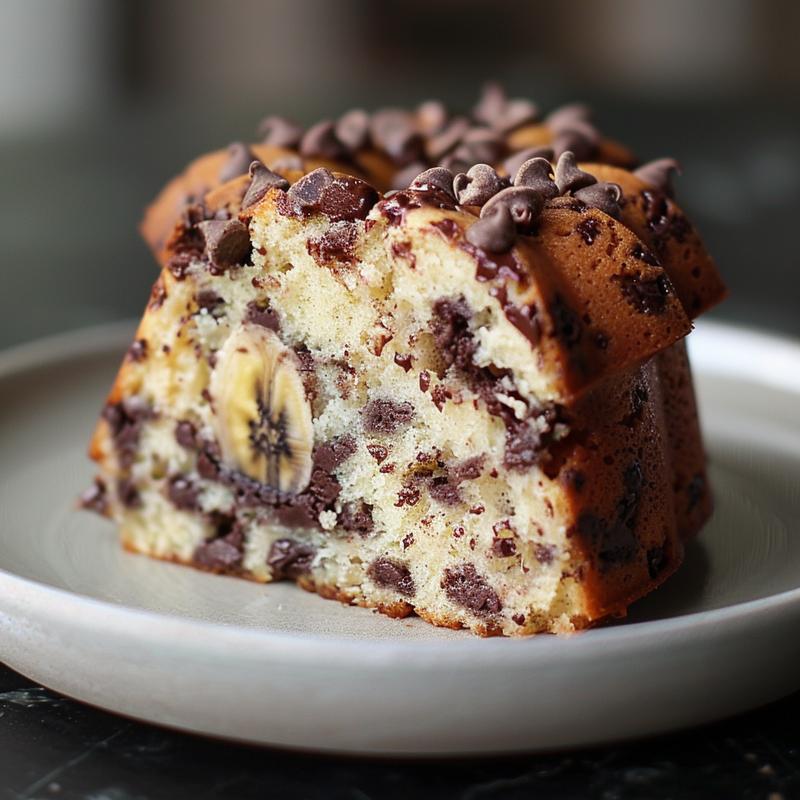
- Moist and Flavorful: With ripe bananas and rich chocolate chips, this cake is bursting with flavor in every bite!
- Simple Ingredients: You probably have most of the ingredients on hand, making it super easy to whip up anytime you get a craving.
- Stunning Presentation: That beautiful bundt shape makes it a showstopper at any gathering. Perfect for impressing your friends!
- Versatile Treat: Enjoy it as a dessert, snack, or even breakfast—because who says cake isn’t breakfast food? 😉
- Make-Ahead Friendly: Bake it in advance and enjoy it for days, just remember to store it properly to keep it fresh!
Ingredient Breakdown & Substitutions
Before you start mixing, let’s talk about the ingredients! Here’s what you’ll need:
- 3 ripe bananas, mashed: The riper, the better! They add moisture and sweetness.
- 1/2 cup unsalted butter, softened: For that rich flavor. You can swap it with coconut oil for a dairy-free option.
- 1 cup granulated sugar: This is essential for sweetness. You can use brown sugar for a deeper flavor.
- 2 large eggs: They help bind everything together. Flax eggs work too for a vegan version!
- 1 teaspoon vanilla extract: A must for that lovely aroma. Feel free to use almond extract for a twist!
- 1 1/2 cups all-purpose flour: This is the backbone of your cake, but you can swap it with whole wheat flour for a healthier option.
- 1 teaspoon baking soda: This helps the cake rise beautifully.
- 1/2 teaspoon salt: Don’t skip this—it enhances all the flavors!
- 1/2 cup sour cream: Adds moisture. Greek yogurt can be a fantastic substitute.
- 1 cup chocolate chips: Semi-sweet or dark; it’s your call! Add mini chocolate chips for a fun texture.
How to Make Your Banana Chocolate Chip Bundt Cake
Ready to get baking? Let’s go through the steps to create this masterpiece:
- Preheat the oven to 350°F (175°C) and grease a bundt pan. Make sure to get into all those nooks and crannies!
- In a large bowl, cream together the softened butter and sugar until light and fluffy. This step is crucial for the perfect texture!
- Add the mashed bananas, eggs, and vanilla extract to the butter mixture. Mix until well combined and smooth.
- In a separate bowl, whisk together the flour, baking soda, and salt. This ensures even distribution of the dry ingredients.
- Gradually add the dry ingredients to the wet mixture, alternating with the sour cream. Mix until just combined—don’t overdo it!
- Fold in the chocolate chips gently. We want them to be evenly distributed without overmixing.
- Pour the batter into the prepared bundt pan and smooth the top with a spatula.
- Bake for 50-60 minutes or until a toothpick inserted into the center comes out clean. Your kitchen will smell amazing during this time!
- Allow the cake to cool in the pan for 10 minutes before inverting it onto a wire rack to cool completely. Patience is key here!
Pro Tips for the Perfect Bundt Cake
- Use Overripe Bananas: The darker the bananas, the better! They’re sweeter and mash easier.
- Don’t Skip the Cooling Time: This helps the cake set and prevents it from falling apart when you invert it.
- Grease Your Pan Well: Bundt cakes can be tricky to remove. Ensure every inch is greased!
- Cool Completely Before Glazing: If you’re adding a glaze, wait until the cake is fully cooled to prevent it from melting away.
- Experiment with Add-Ins: Try adding nuts, dried fruits, or even a swirl of peanut butter for a fun twist!
- Store Properly: Keep leftovers in an airtight container at room temperature for up to 3 days or in the fridge for a week.
- Make Mini Bundts!: If you have mini bundt pans, this recipe is perfect for smaller portions and quicker baking!
- Use a Toothpick Test: If you’re unsure if it’s done, insert a toothpick into the center. It should come out clean or with a few crumbs.
Common Mistakes & Troubleshooting
Even the best bakers make mistakes! Here’s how to avoid common pitfalls:
- Too Dry? Ensure you’re using the correct measurements and don’t overmix the batter!
- Too Dense? This could be due to overmixing or old baking soda. Always check your baking powder and soda to make sure they’re fresh.
- Sticking to the Pan? Remember to grease your pan thoroughly and let it cool for a bit before inverting it.
- Uneven Baking? Make sure your oven is properly calibrated. Rotate the pan halfway through if your oven has hot spots.
Delicious Variations to Try
Want to mix things up? Here are some fun variations:
- Nutty Banana Bundt: Add 1 cup of chopped walnuts or pecans for a crunchy texture!
- Coconut Banana Bundt: Mix in 1/2 cup of shredded coconut for a tropical vibe.
- Peanut Butter Swirl: Swirl in some creamy peanut butter before baking for an extra layer of flavor.
- Spiced Banana Bundt: Add 1 teaspoon of cinnamon or nutmeg for a warm, spiced flavor profile.
Storage & Make-Ahead Instructions
Wanna bake ahead of time? Here’s how to keep your cake fresh:
- Room Temperature: Keep the cake covered at room temperature for up to 3 days. It’s best enjoyed fresh!
- Refrigeration: For longer storage, wrap tightly in plastic wrap and refrigerate for up to a week.
- Freezing: Freeze slices in an airtight container for up to 3 months. Just thaw at room temperature when you’re ready to enjoy!
Frequently Asked Questions
Got questions? I’ve got answers! Here are some FAQs about this banana chocolate chip bundt cake:
- Can I use frozen bananas? Absolutely! Just thaw them and mash them up before using.
- Can I make this cake gluten-free? Yes! Substitute with a 1:1 gluten-free flour blend.
- What can I use instead of sour cream? Greek yogurt is a great substitute for a similar texture and flavor.
- Is it okay to leave out the chocolate chips? Sure! You can replace them with nuts or dried fruits if you prefer.
- How can I tell when the cake is done? A toothpick inserted into the center should come out clean or with a few moist crumbs.
- Can I add a glaze? Yes! A simple icing sugar glaze would be delicious on top.
- How do I prevent it from sticking? Ensure your bundt pan is well-greased and consider using a flour and butter mixture.
- Can I double the recipe? Totally! Just be mindful of the baking time, as it may take a bit longer.
Nutritional Tips & Dietary Adaptations
This cake can be enjoyed as part of a balanced diet! Here are some tips:
- Portion Control: Enjoy in moderation, especially if you’re watching your sugar intake.
- Dairy-Free Option: Use coconut oil and a non-dairy yogurt for a delicious dairy-free cake.
- Lower Sugar Option: Replace some of the sugar with mashed dates or applesauce for a healthier alternative.
- Protein Boost: Add a scoop of protein powder into the batter for an extra health kick!
Essential Equipment Recommendations
Make sure you’re equipped with the right tools:
- Bundt Pan: A quality non-stick bundt pan is essential for easy release.
- Mixing Bowls: Use a large mixing bowl for all your ingredients to avoid spills.
- Whisk and Spatula: A good whisk for mixing and a spatula for folding are must-haves!
- Cooling Rack: This helps cool your cake evenly and prevents sogginess.
Serving Suggestions
Now that your cake is baked, let’s talk about how to serve it:
- With a Dusting of Powdered Sugar: For a simple yet elegant touch, dust the top with powdered sugar before serving.
- With Fresh Fruit: Serve alongside fresh berries or sliced bananas for a fruity twist.
- With Ice Cream: A scoop of vanilla ice cream on the side takes this dessert to the next level!
- As a Breakfast Treat: Enjoy it with your morning coffee or tea. Who doesn’t love cake for breakfast?!
Conclusion
So there you have it, my dear friends! The ultimate Banana Chocolate Chip Bundt Cake you didn’t know you needed in your life. 😍 Not only is it super easy to make, but it’s also incredibly delicious and versatile. Whether you’re hosting a brunch, celebrating a birthday, or just treating yourself, this cake is sure to impress. Remember, baking is all about having fun, so don’t be afraid to get creative! Happy baking, and I can’t wait to hear how much you love this recipe! 🍌🍫


Banana Chocolate Chip Bundt Cake Recipe
Ingredients
Method
- Preheat oven to 350°F (175°C) and grease a bundt pan.
- Cream butter and sugar, then add bananas, eggs, and vanilla; mix well.
- Whisk flour, baking soda, and salt; add to wet ingredients with sour cream, mix until combined.
- Fold in chocolate chips, pour batter into pan, and smooth the top.
- Bake for 50-60 minutes, cool in pan for 10 minutes, then invert onto a wire rack.
Notes
Loved this recipe? Save it to your favorite Pinterest board so you can easily find it later! ✨