
As the summer days start to fade and the school bells ring once again, it’s time to think about fun and creative ways to celebrate the return to school! One of my favorite ways to do this is by making adorable Back to School Wafers Cookies. These delightful treats are not only easy to make but also perfect for classroom celebrations and snacks. Plus, they’re a fantastic way to get the kids involved in the kitchen! So, let’s dive into this sweet adventure together!
Why You’ll Love This Recipe
- Quick and easy to prepare, making them perfect for busy weeknight dinner ideas.
- Colorful and fun, these School Treats will brighten up any classroom party.
- Customizable with your favorite colors and decorations, ensuring every batch is unique!
- Great for bonding time with kids, as they can help with decorating.
- Perfect for sharing with friends and family, making them a hit at any gathering.
Ingredients
To whip up these delightful Wafer Cookies, you’ll need the following ingredients:
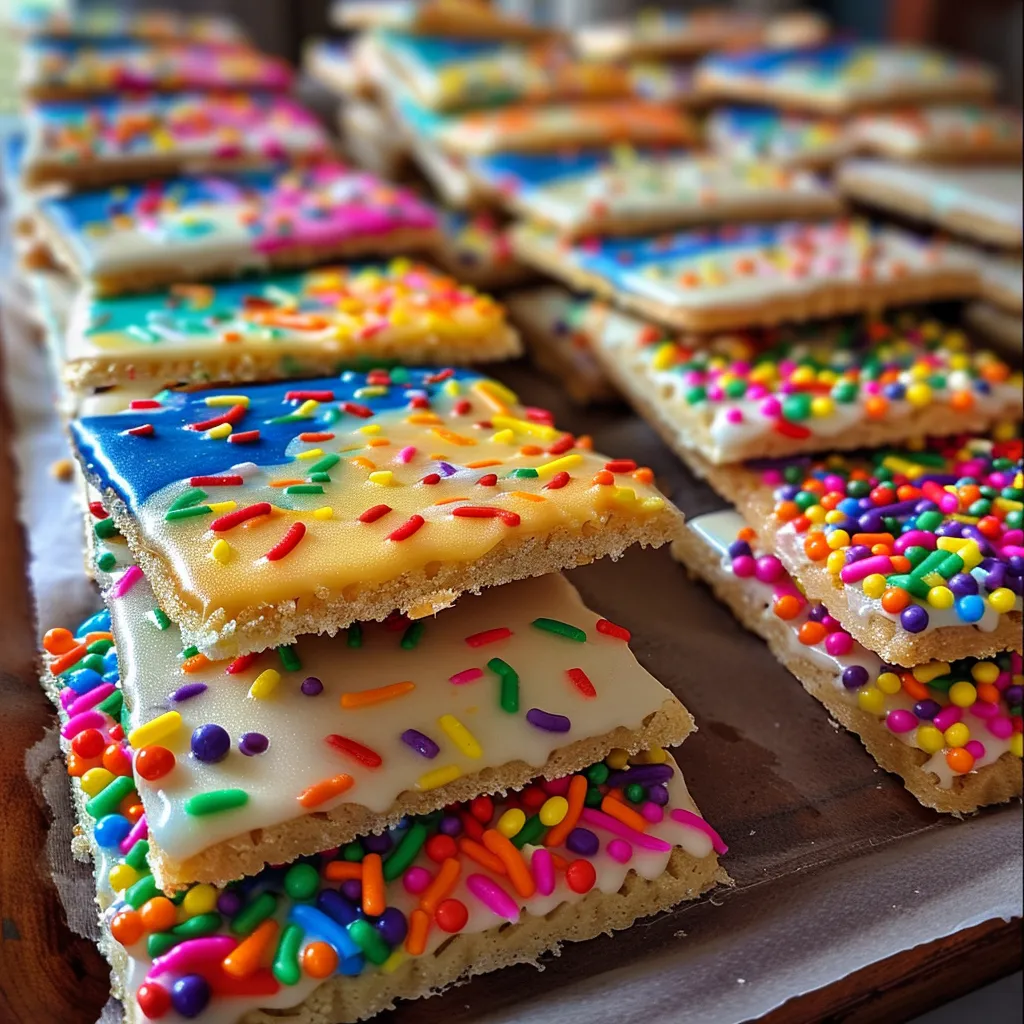
- Approximately 24-30 rectangular or square wafer cookies
- 12 oz (about 340g) Melting Wafers/Candy Melts in various school-themed colors
- A set of fine-tipped edible food markers in black and other bright colors
- Assorted Sprinkles
- 2-3 tablespoons Vegetable Shortening or Coconut Oil (for thinning candy melts if needed)
- Small ziplock bags or piping bags (for intricate drizzling)
- Parchment paper or wax paper
Full ingredient list with measurements is provided in the printable recipe card below.
How to Make the Recipe
Now, let’s get started on making these delightful Sweet Snacks!
Step 1: Set Up Your Decorating Station
First things first, let’s create a fun decorating station! Gather all your ingredients and tools on a clean countertop. Lay down some parchment paper or wax paper to catch any drips and make cleanup a breeze.
Step 2: Melt the Magic
Next, it’s time to melt those colorful melting wafers! Place your wafers in a microwave-safe bowl and heat them in 30-second intervals, stirring in between until they are completely melted. If the mixture is too thick, add a little vegetable shortening or coconut oil to thin it out.
Step 3: Dip and Dazzle
Once your melting wafers are ready, it’s time to dip! Take a wafer cookie and dip one half into the melted chocolate, allowing any excess to drip off. Place the dipped cookie on your prepared parchment paper and sprinkle with your favorite toppings while the chocolate is still wet.
Step 4: Chill Out (and Set)
After decorating, pop the cookies in the fridge for about 15-20 minutes to let the chocolate set. This is the perfect time to clean up your station and maybe even whip up some easy pasta recipes for dinner!
Step 5: Get Creative with Edible Markers
Once the chocolate has set, it’s time to unleash your creativity! Use the fine-tipped edible food markers to draw fun designs, messages, or even little school-themed doodles on your cookies. The kids will love this part!
Step 6: Final Flourish (Optional)
If you want to take your cookies to the next level, consider drizzling some extra melted chocolate over the top for a final flourish. Just use a piping bag or a ziplock bag with a small corner snipped off to create beautiful designs.
Pro Tips for Making the Recipe
Here are some helpful suggestions to ensure your Back to School Wafers Cookies turn out perfectly:
- Experiment with different colors of melting wafers to match your school’s colors or the season.
- Use a variety of sprinkles to add texture and fun to your cookies.
- If you’re short on time, you can skip the edible markers and just use sprinkles for decoration.
- Make sure to let the cookies cool completely before stacking them to avoid sticking.
How to Serve
These Sweet Treats are perfect for any occasion! Serve them at school parties, birthday celebrations, or even as a fun after-school snack. You can arrange them on a colorful platter or package them in cute bags for a delightful gift. They also make a great addition to lunchboxes!
Make Ahead and Storage
If you want to prepare these cookies in advance, they can be made a day or two ahead of time. Just store them in an airtight container at room temperature. If you have any leftovers (which is rare!), they can be kept for up to a week. Just make sure to separate layers with parchment paper to prevent sticking.
So there you have it! A fun and easy recipe for Back to School Wafers Cookies that will surely be a hit in your home and classroom. If you’re looking for more delicious ideas, check out my White Chicken Enchiladas or try my Healthy Chicken and Broccoli Chinese Takeout for quick family dinners. And don’t forget to explore my Zero Point Chicken Salad for a light and refreshing meal. Happy baking!
Back to School Wafers Cookies
Ingredients
Method
- Set up your decorating station with melted wafers, markers, and sprinkles.
- Melt the candy wafers with shortening or oil until smooth.
- Chill cookies until the coating is firm.
- Use edible markers to draw school-themed designs and add sprinkles for extra flair.
- Allow decorated cookies to fully set before serving.